centos7.6搭建fastdfs5.5
[TOC]
安装fastdfs
使用yum安装所需组件
[root@localhost]# yum install -y gcc gcc-c++ libevent pcre pcre-devel zlib zlib-devel openssl openssl-devel安装libfastcommon
- 下载libfastcommon1.0.7安装包并上传到服务器
- 解压并安装
[root@localhost tools]# tar xf libfastcommon-1.0.7.tar.gz
[root@localhost tools]# cd libfastcommon-1.0.7
[root@localhost libfastcommon-1.0.7]# ./make.sh && ./make.sh install- libfastcommon-1.0.7安装成功如下所示

- libfastcommon安装好后会在/usr/lib64 目录下生成 libfastcommon.so 库文件但是由于FastDFS程序引用usr/lib目录所以需要将/usr/lib64下的库文件拷贝至/usr/lib下
[root@localhost]# cp /usr/lib64/libfastcommon.so  /usr/lib/libfastcommon.so
[root@localhost]# ll /usr/lib/libfastcommon.so
-rwxr-xr-x. 1 root root 281072 May 21 21:34 /usr/lib/libfastcommon.so
安装fastdfs
- 下载FastDFS_v5.05.tar.gz并上传到服务器
- 解压并安装
[root@localhost tools]# tar xf FastDFS_v5.05.tar.gz
[root@localhost tools]# cd FastDFS
[root@localhost FastDFS]# ls
client  common  conf  COPYING-3_0.txt  fastdfs.spec  HISTORY  init.d  INSTALL  make.sh  php_client  README.md  restart.sh  stop.sh  storage  test  tracker
[root@localhost FastDFS]# ./make.sh && ./make.sh install- 安装成功如下图所示

- 安装成功将安装目录下的conf下的文件拷贝到/etc/fdfs/下
[root@localhost FastDFS]# cp conf/* /etc/fdfs/
[root@localhost FastDFS]# ll /etc/fdfs
total 104
-rw-r--r--. 1 root root 23981 May 21 21:40 anti-steal.jpg
-rw-r--r--. 1 root root  1461 May 21 21:40 client.conf
-rw-r--r--. 1 root root  1461 May 21 21:37 client.conf.sample
-rw-r--r--. 1 root root   858 May 21 21:40 http.conf
-rw-r--r--. 1 root root 31172 May 21 21:40 mime.types
-rw-r--r--. 1 root root  7829 May 21 21:40 storage.conf
-rw-r--r--. 1 root root  7829 May 21 21:37 storage.conf.sample
-rw-r--r--. 1 root root   105 May 21 21:40 storage_ids.conf
-rw-r--r--. 1 root root  7102 May 21 21:40 tracker.conf
-rw-r--r--. 1 root root  7102 May 21 21:37 tracker.conf.sample
[root@localhost FastDFS]#
配置并启动tracker
- 使用vim编辑/etc/fdfs/tracker.conf配置文件
base_path=/home/yuqing/fastdfs  #把目录改为自己的安装目录,比如base_path=/data/fdfs/tracker
http.server_port=8080  #把8080改为80,http.server_port=8080
bind_addr= #改为自己服务器的IP地址,建议使用内网地址- 修改完保存并启动
[root@localhost fdfs]# mkdir -p /data/fdfs/tracker   #创建刚才配置的存储目录
[root@localhost fdfs]# /usr/bin/fdfs_trackerd /etc/fdfs/tracker.conf start  # start为启动,restart为重启,stop为停止
[root@localhost fdfs]# ps -ef |grep fdfs  # 查询fdfs进程
root       2531      1  0 21:45 ?        00:00:00 /usr/bin/fdfs_trackerd /etc/fdfs/tracker.conf start
root       2539   17200 21:46 pts/0    00:00:00 grep --color=auto fdfs
[root@localhost fdfs]# netstat -anpt |grep 22122 |grep LISTEN  #查询tracker的启动端口,默认为22122,在配置文件的port项修改
tcp        0      0 192.168.1.55:22122      0.0.0.0:*               LISTEN      2531/fdfs_trackerd
[root@localhost fdfs]#
配置并启动storage
- 使用vim编辑/etc/fdfs/storage.conf配置文件
bind_addr=  #改为自己服务器的IP地址,建议使用内网地址
base_path=/home/yuqing/fastdfs  #改为自己服务器的目录存储路径,比如base_path=/data/fdfs/storage
store_path0=/home/yuqing/fastdfs  #改为自己服务器的目录存储路径,比如store_path0=/data/fdfs/storage
tracker_server=192.168.209.121:22122  #改为自己的tracker地址
http.server_port=8888 #改为80- 修改完保存并启动
[root@localhost fdfs]# mkdir -p /data/fdfs/storage   #创建刚才配置的存储目录
[root@localhost fdfs]# /usr/bin/fdfs_storaged /etc/fdfs/storage.conf start  # start为启动,restart为重启,stop为停止
[root@localhost fdfs]# ps -ef |grep fdfs   # 查询fdfs进程
root       2531      1  0 21:45 ?        00:00:00 /usr/bin/fdfs_trackerd /etc/fdfs/tracker.conf start
root       2552      1 16 21:52 ?        00:00:00 /usr/bin/fdfs_storaged /etc/fdfs/storage.conf start
root       2562   1720  0 21:52 pts/0    00:00:00 grep --color=auto fdfs
[root@localhost fdfs]# netstat -anpt |grep 23000 |grep LISTEN  #查询tracker的启动端口,默认为23000,在配置文件的port项修改
tcp        0      0 192.168.1.55:23000      0.0.0.0:*               LISTEN      2552/fdfs_storaged
[root@localhost fdfs]#
配置client
- 使用vim编辑/etc/fdfs/client.conf配置文件
base_path=/home/yuqing/fastdfs   #改为storage的目录
tracker_server=192.168.0.197:22122  #改为tracker的地址
配置fdfs的storage及tracker使用系统服务管理
- 在/lib/systemd/system/fdfs_tracker.service写入以下内容
[Unit]
Description=FastDFS Tracker and Storage
After=syslog.target network.target

[Service]
Type=forking
ExecStart=/usr/bin/fdfs_trackerd /etc/fdfs/tracker.conf start
ExecStop=/usr/bin/fdfs_trackerd /etc/fdfs/tracker.conf stop
PrivateTmp=true

[Install]
WantedBy=multi-user.target- 在/lib/systemd/system/fdfs_storage.service写入以下内容
[Unit]
Description=FastDFS Tracker and Storage
After=syslog.target network.target

[Service]
Type=forking
ExecStart=/usr/bin/fdfs_storaged /etc/fdfs/storage.conf start
ExecStop=/usr/bin/fdfs_storaged /etc/fdfs/storage.conf stop
PrivateTmp=true

[Install]
WantedBy=multi-user.target- 启动fdfs并设置开机自启
[root@localhost system]# service fdfs_tracker start
Redirecting to /bin/systemctl start fdfs_tracker.service
[root@localhost system]# service fdfs_storage start
Redirecting to /bin/systemctl start fdfs_storage.service
[root@localhost conf]# systemctl enable fdfs_tracker.service
Created symlink from /etc/systemd/system/multi-user.target.wants/fdfs_tracker.service to /usr/lib/systemd/system/fdfs_tracker.service.
[root@localhost conf]# systemctl enable fdfs_storage.service
Created symlink from /etc/systemd/system/multi-user.target.wants/fdfs_storage.service to /usr/lib/systemd/system/fdfs_storage.service.- 到此fdfs安装完成,接下来就是nginx和fdfs进行整合使fdfs上传的图片或者文件在浏览器可以访问
安装nginx
配置nginx需要的fastdfs的模块
- 下载fastdfs-nginx-module_v1.16.tar.gz并上传到服务器
- 解压并修改config文件,把文件中所有的/usr/local/修改为/usr/
[root@localhost tools]# tar xf fastdfs-nginx-module_v1.16.tar.gz
[root@localhost tools]# cd fastdfs-nginx-module
[root@localhost fastdfs-nginx-module]# ls
HISTORY  INSTALL  src
[root@localhost fastdfs-nginx-module]# cd src/
[root@localhost src]# ls
common.c  common.h  config  mod_fastdfs.conf  ngx_http_fastdfs_module.c
[root@localhost src]# vim config - 把mod_fastdfs.conf文件放到fdfs的配置文件目录下并修改
[root@localhost src]# cp mod_fastdfs.conf /etc/fdfs/
[root@localhost src]# ls
common.c  common.h  config  mod_fastdfs.conf  ngx_http_fastdfs_module.c
[root@localhost src]# cd /etc/fdfs/
[root@localhost fdfs]# ls
anti-steal.jpg  client.conf  client.conf.sample  http.conf  mime.types  mod_fastdfs.conf  storage.conf  storage.conf.sample  storage_ids.conf  tracker.conf  tracker.conf.sample
[root@localhost fdfs]# vim mod_fastdfs.conf

把文件中的配置项安装以下进行修改
base_path=/tmp   #改为storage的存储目录
tracker_server=tracker:22122  #改为tracker的访问地址
url_have_group_name = false  #改为true
store_path0=/home/yuqing/fastdfs #改为storage的存储路径- 将libfdfsclient.so拷贝至/usr/lib下
cp /usr/lib64/libfdfsclient.so /usr/lib/安装nginx
- 下载nginx安装包并上传到服务器
- 解压并指定安装目录和模块目录nginx
[root@localhost tools]# tar xf nginx-1.21.3.tar.gz
cd[root@localhost tools]# cd nginx-1.21.3
[root@localhost nginx-1.21.3]# ls
auto  CHANGES  CHANGES.ru  conf  configure  contrib  html  LICENSE  man  README  src
[root@localhost nginx-1.21.3]# ./configure --prefix=/usr/local/nginx --add-module=/usr/local/tools/fastdfs-nginx-module/src- 成功截图

- 编译安装
[root@localhost nginx-1.21.3]# make && make install- 成功截图

- 修改nginx配置文件
[root@localhost nginx-1.21.3]# cd /usr/local/nginx/conf
[root@localhost nginx-1.21.3]# vim nginx.conf- 修改前:
- 修改后:

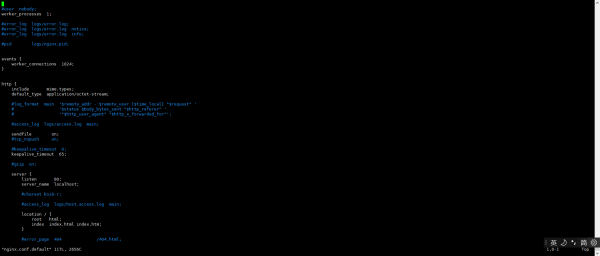
- 配置文件如下
user  root;
worker_processes  auto;
error_log  logs/error.log;
pid        logs/nginx.pid;
events {
    use epoll;
    worker_connections  65535;
}
http {
    include       mime.types;
    default_type  application/octet-stream;
    log_format  main  '$remote_addr - $remote_user [$time_local] "$request" '
                      '$status $body_bytes_sent "$http_referer" '
                      '"$http_user_agent" "$http_x_forwarded_for"';
    access_log  logs/access.log  main;
    sendfile        on;
    gzip on;
    gzip_min_length 1k;
    gzip_buffers 4 16k;
    gzip_http_version 1.1;
    gzip_comp_level 2;
    gzip_types text/plain text/css text/xml application/javascript;
    gzip_vary on;
    keepalive_timeout  65;
    server {
    listen 80;
    server_name 10.243.8.44;
    location ~/group[0-9]/ {
        root /home/fdfs/storage/data;
        ngx_fastdfs_module;
        }
    }
}
配置nginx使用系统服务管理
- 在/lib/systemd/system/nginx.service写入以下内容
[Unit]
Description=FastDFS Tracker and Storage
After=syslog.target network.target

[Service]
Type=forking
ExecStart=/usr/local/nginx/sbin/nginx
ExecStop=/usr/local/nginx/sbin/nginx -s stop
PrivateTmp=true

[Install]
WantedBy=multi-user.target- 启动nginx并设置开机自启
[root@localhost conf]# service nginx start
Redirecting to /bin/systemctl start nginx.service
[root@localhost conf]# systemctl enable nginx.service
Created symlink from /etc/systemd/system/multi-user.target.wants/nginx.service to /usr/lib/systemd/system/nginx.service.
上传图片测试查看
- 在服务器本地使用上传命令上传图片测试
[root@localhost conf]# cd /etc/fdfs/
[root@localhost fdfs]# /usr/bin/fdfs_test /etc/fdfs/client.conf upload anti-steal.jpg
This is FastDFS client test program v5.05
Copyright (C) 2008, Happy Fish / YuQing
FastDFS may be copied only under the terms of the GNU General
Public License V3, which may be found in the FastDFS source kit.
Please visit the FastDFS Home Page http://www.csource.org/
for more detail.
[2022-05-21 22:21:30] DEBUG - base_path=/data/fdfs/storage, connect_timeout=30, network_timeout=60, tracker_server_count=1, anti_steal_token=0, anti_steal_secret_key length=0, use_connection_pool=0, g_connection_pool_max_idle_time=3600s
, use_storage_id=0, storage server id count: 0
tracker_query_storage_store_list_without_group:
server 1. group_name=, ip_addr=192.168.1.55, port=23000
group_name=group1, ip_addr=192.168.1.55, port=23000
storage_upload_by_filename
group_name=group1, remote_filename=M00/00/00/wKgBN2KI9WqAfp1HAABdrZgsqUU240.jpg
source ip address: 192.168.1.55
file timestamp=2022-05-21 22:21:30
file size=23981
file crc32=2553063749
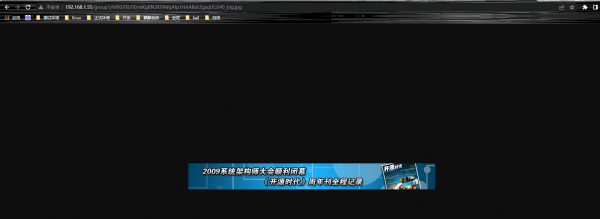
example file url: http://192.168.1.55/group1/M00/00/00/wKgBN2KI9WqAfp1HAABdrZgsqUU240.jpg
storage_upload_slave_by_filename
group_name=group1, remote_filename=M00/00/00/wKgBN2KI9WqAfp1HAABdrZgsqUU240_big.jpg
source ip address: 192.168.1.55
file timestamp=2022-05-21 22:21:30
file size=23981
file crc32=2553063749
example file url: http://192.168.1.55/group1/M00/00/00/wKgBN2KI9WqAfp1HAABdrZgsqUU240_big.jpg
[root@localhost fdfs]# - 浏览器访问example file url:地址,整合成功的话就会看到如下图
扫描二维码,在手机上阅读